In a previous post I detailed (in my head at least) the “shopping list” of bits needed to implement a simple service mesh, you can read that here https://thebsdbox.co.uk/2024/11/30/Building-your-own-service-mesh/. Whilst that post covered some of the theoretical bits and the eBPF 🐝 magic, my aim is to wrap up all of the other pieces needed here.
The proxy
In this “build your own” service mesh, the proxy will live next to the application that we care about.
OMG a sidecar 😱
How that sidecar gets there can be an interesting discussion, so lets look at the choices.
You maintain some yaml, basically your deployments will need to have the sidecar added to to them. This has to be before you deploy as you can’t add a sidecar to an existing pod.
But what about ephemeral containers! (I hear you ask), well they’re pretty good and yes you can add them to an existing pod. BUT, if you need to mount files (like 🔐 certificates), then Volumes need adding to the pod.spec and you can’t do that. AH HA! I hear you think, use secrets and environment variables! that way it doesn’t modify the main body of the pod.spec, just the pod.spec.ephemeralcontainer[x]. Great idea, but it doesn’t work and there has been an issue open about it for nearly (checks notes) 2 years.
Ye olde sidecar injector! The defacto method of modifying a pod.specbefore it’s actually committed to the Kubernetes API. (I won’t go into detail as people have written about this for some time)
So regardless of how the proxy gets there, it needs to be there. There will be a proxy in every application that we care about. When one pod wants to talk to another pod it will actually be the proxies that are doing the talking!
What is in a proxy
Our eBPF code
Code that will create connections and TCP listeners for sending and receiving traffic
The required certificates in order for traffic to be encrypted
Proxy startup
On startup out proxy will determine it’s own pid and along with the pod CIDR range add that to an eBPF map, it will then attach our eBPF programs to the kernel. Once that has occurred it will start the proxy listener, this is where our proxy will receive all traffic forwarded by our eBPF program. It will then read the certificates (from the filesystem or environment variables) and once they’re loaded it will start another listener for incoming TLS connections! That’s it.
Proxy running lifecycle
The proxy is listening on it’s internal proxy port
A new connection is received on this port hijacked by eBPF 🐝, where we do a getsockopt syscall with the option SO_ORIGINAL_DST. This returns to us the original destination address and port that this connection was heading to before we hijacked it with eBPF.
We create a new outbound connection to the original destination address, however we substitute the port with that of the proxies TLS listening port. This initiates a new TLS connection between both proxies!
The source proxy will send to the destination proxy the port that we were originally accessing.
The destination proxy will connect to that port and begin receiving traffic from the source.
At this point we have full end-to-end connectivity from one application to another, without the applications realising that we’re in the middle!
Creating Certificates 📝
In order for the TLS to work the certificates will need to be created with the correct details, namely the IP addresses of the pods to ensure that the identification works correctly. This raising a chicken and egg scenario as ideally we require these details asap, however we only can be allocated this IP address once the pod has been created by the Kubernetes API. As we can’t modify the Volume section of a pod once it has been created we can refer to secrets as environment variables before they have been created.
We then write some code to using Kubernetes informers, there is excellent detail here. These informers will “inform” us when a pod has been both created and updated , we care more about the update as this is the operation where the pod.status.podIP will be populated with the address we care about. Once we have this we can create the required certificates and upload them as a secret to be used by the proxy container.
The final piece is the injector 💉
This is relatively straight forward, this piece of code will on startup register through the AdmissionController that certain resources (pods in our case) when created be sent to our code. Which will patch the pod.spec to now include our container as an initContainer, and be sent back to the Kubernetes API server to be scheduled.
In Summary
We “kind of” have the makings of a service mesh at this point (in my mind at least), we transparently move traffic from the application through our proxy, where we can apply what we wish. In this Proof of concept we newly mint certificates and then establish end to end mTLS, where traffic is encrypted between source and destination. Although that doesn’t mean we have to end there 😀
What next..
All the source code for this experiment is available at https://github.com/thebsdbox/smesh so feel free to go and have a look around. It isn’t the tidiest, but it does work 😂
I saw a few mentions about “service mesh” and mTLS amongst other things during the KubeCon US week and given some of the messing around i’d been doing with eBPF recently I asked myself “how hard could it be to write one from scratch”?
The service mesh shopping list
There are a bunch of components that we will need to implement in order for us to implement the “service mesh” type behaviour. Most service meshes implement a heck of a lot more, we’re exploring the basics needed to implement it.
Traffic redirector 🚦
We need a way of taking traffic from an application and sending it elsewhere, typically to our proxy where we will potentially modify the traffic. The traffic needs to be redirected in a way where the application does’t need to know about it occurring, however we need to ensure that the traffic will reach its destination and traffic is returned in a way that makes sense to the application. In most circumstances this is handled by iptables rules that will change the source and destination of the packets as they navigate the kernel. As a pod initiates a connection to another pod within the cluster we will need to redirect it to our program, which we will call the proxy.
The Proxy
Our proxy will need to be listening somewhere that is accessible on the network and as outbound connections are created their destination will be modified to that of the proxy (we also need to keep a copy of that destination somewhere). At this point we will start receiving data from the source and it is here were we opportunity to potentially change the original traffic or parse the traffic and then make decisions based upon what we learn.
The Injector 💉
The injector is code that will modify the behaviour of Kubernetes so that when new workloads are scheduled an additional container could be added, or something could run before the workload starts that will write iptables/nftables rules into the kernel.
Certificates 📝
If we are wanting to use mTLS between pods then we will need to create certificates, these certs will need things like the pod IPs or pod hostnames etc. in order for the certificates to work. Given that we wont know these details until the pod starts we will need to capture this information by watching Kubernetes and creating the certificates when we see a pod being created.
Lets get started 🐝
If I can’t control the traffic then I can’t do anything, so first things first, I’m going to use eBPF in order to manipulate the traffic and make sure that it is sent to where I need it to go. Why eBPF? well because!
So lets walk this through…
There are a bunch of methods for manipulating traffic XDP, TC, sockets etc.. so what’s the choice?
XDP? Nope, no egress and if we’re wanting to capture traffic being initiated out to somewhere else, then that’s egress.
TC? It has egress, BUT it’s already gone through the kernel, iptables, sockets etc.. changing the traffic to send back into the kernel is a bit of a pain.
Sockets, seems like the best option for what we’re aiming for.
The eBPF 🐝 magic 🪄
Our eBPF code is going to manipulate the L3 & L4 behaviour of packets as they traverse the kernel and in some-cases user-land (i.e. the proxy).
The life of our packet is the following!
For this walkthrough:
pod-01 is 10.0.0.10
pod-02 is 10.10.0.20
Our eBPF program is started and is passed the CIDR range of pods in our Kubernetes cluster and the pid of the proxy, this is done through an eBPF map.
The application within the pod (pod-01) is wanting to create an outbound connection connect(), in this case to pod-02. This would typically be a high internal port 32305 (for example) attempting to connect outbound.
The eBPF program will change the destination from 10.10.0.20 to the proxy that is listening on localhost, so 10.10.0.20:<port> would become 127.0.0.1:18000.
We also stuff the original destination address and port into a map, which uses the socket “cookie” as it’s key.
The proxy on 127.0.0.1:18000 will receive all the TCP magic from the application that started the connection and once the socket has been established we hook in with eBPF.
Here we will add to another map the source port 32305 and the unique socket “cookie”.
The proxy has an established connection from the application, however it needs to know the original destination, we do this through calling a syscall getsockopt with a specific option SO_ORIGINAL_DST. This is captured by eBPF, which it does a look up on the src port 32305 to find the cookie, it then uses the cookie to look up in another map to return the original destination 10.10.0.20:<port>.
The proxy can now establish a connection outbound to the destination pod or another proxy (this will be covered later).
As traffic is read() from the proxy it is then forwarded to the internal connection and the application in pod-01 processes it as if there was no proxy in the middle.
Why do we pass the pid of the proxy into the eBPF program? (I hear you ask)
Well, we would end up in a loop if the proxy has it’s out bound connections looped back to itself. So if we see a connection from the proxy then we don’t redirect it.
< We've looked up the connection through eBPF to find the original destination > < The proxy connects to pod-02 (on it's local proxy port, where it takes care of forwarding to the application in the same pod) and we can now start sending traffic from pod-01 through the proxy >
[2024/12/02T10:18:14.087] [application] [INFO] [connection.go:156,internalProxy] Connected to remote endpoint 10.10.0.20:18443, original dest 10.10.0.20:9000
< The application in pod-02 has established a new connection in the opposite direction >
This post steps through the bits needed in order to form a service mesh and how we use eBPF in order to redirect traffic to another process listening within the same pod. We know that this is achievable, but we now need to understand how to architect these pieces and get traffic across to the other pod! (which i’ll cover in the next post)
This is the third time I’ve tried to write this, a random panic on my Hackintosh wiped out half a blog post and the other attempt read like garbage 🫠. So here we go! I recently added Egress IPv6 to kube-vip, but it isn’t something that I really advertised as functionality in kube-vip, so I though it best to actually write about it. The concept of Egress within Kubernetes is a bit of an interesting one because it also exposes a bit of confusion when it comes to Kubernetes networking. Namely what actually comes out of the box with a Kubernetes cluster.
Kubernetes Networking
When we think about a simple Kubernetes cluster (and deploying it), then we need to consider all of the additional components that are actually required in order for the cluster to actually work. These are commonly thought of as the CxI plugins, where the x is usually R for the runtime, N for the networking plugin and finally S for storage. Without a CRI, there is simply no functionality to stop and start containers effectively making your cluster pointless and additionally without a CNI your containers wont have any networking capabilities! (well it turns out that’s not strictly true).
The CNI in it’s most basic form is largely doing:
Pod networking with IPAM
Multi node networking, allowing pods to speak to one another as if they were on a big flat network (often an overlay)
Network Policy
Ingress typically though hostPort
Above is a gross over simplification of what CNIs accomplish and most now do far more than just basic networking, however there is a huge amount of networking functionality that isn’t explained. Who or what creates a Kubernetes service and manages the forwarding to a pod that is selected, and additionally when a pod wishes to send traffic externally to the cluster who or what is happening.
Kube-Proxy
So if you do a kubectl get pods -A on a cluster you may encounter kube-proxy pods, which typically run on all nodes as a daemonset and are largely there to manipulate the masses of iptables rules required in order to make the internals of a Kubernetes cluster work. Whenever a service is created kube-proxy will create rules that will watch for ingress traffic to that service address, additionally it also keeps track of the endpoints that match that particular service. These rules, regardless of the technology (currently iptables but soon nftables in upstream) will modify traffic that is destined for a service IP and change that destination to one of the endpoint IP addresses. There is a great overview (in epic detail) available at learnk8s.
Where things get interesting is egress traffic, if you had a pod that had busybox+curl and you were using that the curl https://google.com it will typically just work, but the thing about the pod network is that it isn’t meant to be directly accessible! So how does return traffic get to the pod?
So the answer is pretty simple, and it is pretty much the same logic that applies to most household internet connections. This logic is the idea of NAT (Network Address Translation), but simply put like the pod in a Kubernetes cluster your home laptop isn’t directly accessible on the internet however the ADSL/Fibre router is. When an internal device (or pod) wants to connect to the outside world the traffic will traverse the either a physical router or routing logic in the kernel and the destination address is changed to the address of the router. So in the diagram below google.com will receive a connection from the external address which it can communicate with, when it receives traffic from this connection it will then change the address back to the internal address and traffic is then passed back internally.
So this is fine, effectively each node in the cluster will take care of handling the traffic originating from pods by making it look like it’s originating from the node where the pod resides and in most cases this works. However if your cluster has 1000 nodes and you have a pod that wants to access something external protected by a firewall, well that firewall will now need 1000 rules allowing access because who knows where that pod will be scheduled to run in the future. Or perhaps one of those modern app transformation programs actually works (I’ve been part of a myriad of failed attempts to create these programs) and you’ve finally migrated an application that has some static IP requirements, well again there is no way to have anything static in this scenario.
Egress Magic 🪄
The most common solution to implement “controlled” Egress within a Kubernetes cluster is the concept of an Egress gateway and in most cases this is another small pod (or pods) that sit within the cluster that traffic is forwarded to. This gateway will then do the same manipulation however it will typically have a series of IP addresses that it can use dependant on who the originating traffic is coming from. So in theory we could tie our legacy application to its original IP address and the gateway will then take care of manipulating the traffic to make it appear as though this original IP address is still in use.
A few years ago I popped into the #sig-networking channel (excellent place to discuss ideas btw) to discuss egress within Kubernetes as I wanted to implement it within kube-vip. There are a few projects that have implemented through different mechanisms in the past, but largely if you wanted to implement it with a stable architecture the obvious solution was using a gateway (as discussed above). After fiddling around with the rules that kube-proxy implements I decided that perhaps there was an alternative solution!
The kube-vip project is everyones (some peoples) goto project when wanting to deploy a load balancer solution within a Kubernetes cluster, and it is pretty devastatingly simple. Apply a load balancer address to a node, and then when traffic is sent to it the traffic then makes its way to a pod via kube-proxy (easy)!
For Egress could we potentially combine some of the behaviour of both kube-proxy and kube-vip to produce a stable Egress solution? It turns out yes, we can and again it is devastatingly simple. To accomplish this we effectively overload the behaviour of a Kubernetes service by using it to define not only the ingress (as a loadbalancer) but also the egress with additional iptables rules. This creates a 1:1 relationship between a service and a pod and uses the service IP as the pods ingress and egress address.
If we look the above diagram we’ve created a service that selects Pod-01 and the following will happen:
The service load balancer is attached to the node where Pod-01 currently resides
The Kernel is updated so that traffic leaving from Pod-01 should be updated so that it looks like it is coming from the load balancer, so effectively 10.0.0.3 is re-written to become 192.168.0.100.
As the process sends traffic or initiates connections to the Server they are now all coming from the externally facing load balancer address.
In the event Pod-01 is killed or crashes then kube-vip is notified through a Kubernetes watcher, where the event of a pod delete will result in the egress rules being cleaned up. When the Pod reappears on another node, then the egress rules will be re-applied and the traffic will continue to be appearing to come from the same IP address, so we get a level of High Availability for free.
Where is the eBPF 🐝
I’ve wanted to re-implement this functionality in eBPF for quite a long time, however it simply isn’t as easy as I hoped.
“But isn’t there an egress hook for TC?”
Indeed there is, however this hook is the last step in the chain before the packet goes back onto the nic and leaves the machine. What this effectively means is that all of the netfilter (iptables & kube-proxy) magic will have already modified the packet before our eBPF program can see it.
So for now the plan is to migrate kube-vip to use googles nftables GO library and we’ll see what happens next.
Thanks
Lars Ekman
Antonio Ojea
The other folks that listened to my daft ideas in #SIG-NETWORK
Our Journey begins in 2003 were I somehow blagged a Unix role, largely due to experience with FreeBSD and sparse access to a few Unix systems over the years. This first role consisted of four days and twelve hours per shift, where we were expected to watch for alerts and fix a myriad of different systems ranging from:
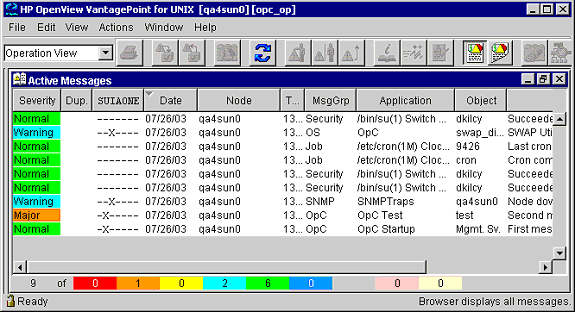
Every alert in HP Openview (which you can see in the screenshot below) would lead down a rabbit hole of navigating various multi-homed jump boxes in order to track down the host that had generated the alert.
Once we finally logged onto the machine we were often presented with a obscure version of Unix, a completely random shell or a user-land set of tooling that was incomprehensible.. it was ace.
Typically in this environment the architecture was 1:1, as in one server would host one big application. Although there were some applications that had strict demands and in some cases penalties in the event of downtime, it was these applications that would often make use of various clustering technologies of the time in order to provide high availability. Given the infrastructure was a complete hodgepodge of varying systems it would stand to reason that the clustering software would follow suit, this meant that we were presented with systems such as:
As mentioned above in this place of work some applications simply weren’t allowed to fail as there would be a penalty (typically per minute of downtime charges) so for these applications a highly available solution is required. These solutions are to keep an application as available to end users as possible, so in the event an application crashes then it’s the clustering softwares job to restart it. Although you could create your own with a bash script:
1
2
3
4
5
6
7
#!/bin/bash while true do echo "Starting program" /usr/bin/exciting_program sleep 1 done
So restarting the program to ensure availability is one thing, but what about things such as OS upgrades or hardware failures? In those use-cases then the application will cease to run as the system itself will be unavailable. This is where multiple systems are clustered together in order to provide a highly available solution to any downtime, when a system becomes unavailable then it’s the clustering softwares role to make a decision about how and where to restart the application. A lot of my time was fighting with Sun Cluster and how it would implement high availability 🫠
Implementing High Availability (back in the day)
In these systems there were a number of pre-requisites in order for high availability to work
Shared storage
If the application had persistent data, and they pretty much all were based upon Oracle databases back then then this underlying storage needed to be shared. This is so that in the event of a failure the storage can be mounted on the node that is selected to take over the workload.
Re-architecting the application
This doesn’t technically mean re-writing the application, it means writing various startup and shutdown scripts with logic in them in order to ensure that the clustering software can successfully complete them without them ending in a failed state.
Networking
If the application was moving around during a failover then external programs or end users still needed to access it with the same address/hostname etc.. so in the event of a failover a virtual IP (VIP) and hostname will typically be added to the node where the application is failing over to.
Quorum
In order for a node to become the chosen one in the cluster a quorum device should be present in order to ensure that a decision can be made about who will takeover the running of applications, and in the case of a network connection failure between nodes that a “split brain” scenario can’t occur.
Split Brain will occur when cluster nodes can no longer communicate, leading them to believe that they’re the only nodes in the cluster and thus voting for themselves in order to become the leader. This would lead to multiple nodes all accessing the same data or advertising conflicting IP addresses, and generally causing chaos.
Did HA work?
Sometimes
One evening I was asked to lead a large planned change to upgrade the hardware on a mighty Sun e10K that was being used to host arguably one of the most important applications within the entire company. The plan was relatively straight forward:
Log into node1, check it was primary and running the application.
Log into node2, ensure its health (hardware/disk space etc..)
Initiate a failover on node1
Watch and ensure services came up on node2 and validate the application was healthy and externally accessible
Upgrade hardware on node1
Check node1 is healthy again (after upgrade)
Initiate a failover on node2, back to node1
Realise something is wrong
Panic
Really panic
Consider fleeing to a far flung country
So what went wrong?
The application failover from node1->node2 went fine, we saw the application shutdown followed by the shared storage being unmounted and finally the network information removed from node1. Then on node2 we witnessed the storage being mounted, the networking details being applied followed by the application being restarted. We even had the applications/database people log in and watch all the logs to ensure that everything came up correctly.
When we failed back things went very wrong, the first application/storage/network all moved back however the second application stopped and everything just hung. Eventually the process excited with an error about the storage being half remounted. The app/database people jumped onto the second node to see what was happening with the first application whilst we tried to work out what was happening. Eventually we tried to bring everything back to node2 where everything was last running successfully and again the application stopped and the process timed out about the storage 🤯
At this point we had a broken application spread across two machines trying to head in opposite directions but stuck in a failed state, at this point various incident teams were being woken up and various people started prodding and poking things to fix it.. this went on for a few hours before we worked out what was going on. (Spoiler it was step 4)
So this change was happening in the middle of the night, meaning that ideally no-one should really be using it or noticing it not working for the “momentary” downtime. One of the applications team was had opened a terminal and had changed directory to where the application logs where (on the shared storage) in order to watch and make sure the application came up correctly. However, this person then went to watch TV or get a nap (who knows) leaving their session logged on and living within the directory on the shared storage. When it came to failing the application back the system refused to unmount the shared storage as something was still accessing the filesystem 🤬 .. even better when we tried to bring the other half of the application back it failed because someone was looking at the database logs when it attempted to unmount the shared storage for that 🫠
I think it was this somewhat stressful experience that weirdly made me want to learn more about Sun cluster and other HA solutions, and here we are today :-D
High Availability in Kubernetes
Much like that script I embedded above, HA is endlessly performed by Kubernetes typically referred to as the “reconciliation loop”. The reconciliation loops role is largely to compare expected state and actual state and reconcile the difference, so expected state if 3 pods and there is only 1 then schedule 2 more etc. Additionally within the Kubernetes cluster (actually it comes from etcd but 🤷🏼♂️) is the concept of leader election, which allows things running within the cluster to use this mechanism to elect a leader amongst all participants. This mechanism allows you to have multiple copies of an application running and with a bit of simple logic ensure that only the active/leader instance is the one that is actually doing the processing or accepting connections etc.
I recently had a little bit of time to kill and decided to see if I could actually do some parsing of other protocols with eBPF. The previous post that I created was about http and whilst it’s an important application protocol to be able to read and potentially manipulate, it feels like there was only so much that could be done. Webpages are highly dynamic and can contain large amounts of data, which are qualities that aren’t always the best to try and parse with eBPF.
So my next attempt was to see how difficult it would be in order to parse something a bit spicier 🌶️! So I recently wrote a basic parsed for BGP messages, which originally was designed to just parse the first bit of data to understand the different message types and give some insight into what was occurring when BGP peers are sending info back and forth, it evolved over the weekend a little bit and now understands peering information and before I decided to write this can now manipulate the data between peers (without the BGP software being aware).
So to begin we will need to do what we always do when we have some network data (the socket buffer skb) in eBPF, which is to check it’s HTTP->TCP/UDP and strip off the headers once we are looking at the correct traffic. This is covered in the previous two eBPF posts, and is in all of the example code so I wont duplicate triplicate the code here. With all of these headers removed (I say removed, we just move the pointer (bit like the needle on a record player) past them so we’re now left with the data portion remaining). With our raw data remaining we now need to convert this into a format that matches the protocol itself, so lets start there!
Protocols
A lot of these protocols are pretty old, and are detailed in documents called Request for Comments or an rfc. These documents put together by experts in the field largely define the architecture of a protocol and a good example, which I used in order to parse HTTP is this one and you can see that this was originally authored in 1999.
So lets get to the crux of it, if you’ve been working with JSON/YAML/XML etc. or anything else that is obviously structured then abandon hope all yee who enter 😂 Almost every protocol has it’s own unique way of how it structures data, some are cleaner than others. To begin with BGP seemed pretty straight forward…
To begin with we’ll need to use the rfc document for the BGP standards, quickly reading through this we can understand that every BGP message starts with the same “fixed size” header:
(the diagrams in rfcs are a tad confusing, however the descriptions are a bit clearer)
Simply put the marker should be 16 octets! (aka 16 bytes), the length should be 2 octets (2 bytes or 16 bits) and the type is 1 octet (1 byte or 8 bits) and with this information we can create a structure to put the raw data in that will allow us to shape it into the BGP Message header.
If we look at our struct above we can see marker is 16 bytes, length is 2 and type is 1 giving us a grand total of (drum roll 🥁) … 19 bytes. So why oh why, when we do a sizeof(bgp_message) do we end up with 20 bytes 🤯 This was specifically an issue with the BGP keep alive messages that consist of just a BGP message (Type set to 4), where I would attempt to read the BGP message header (expecting it to be 19 bytes) and the compiler was trying to read 20, which was obviously 1 byte too many causing the load_bytes function to fail.
So after some annoying failed attempts to copy 20 bytes our of 19, I realised that my bpg_message struct is probably being padded, this is process of adding some additional data making it more efficient for the CPU to load and store the data. More detail is available here, in most cases it’s not a problem, however we need everything to align perfectly so set packing per byte we can add the following #pragma pack(1) (which effectively disables packing). Now our struct is the correct size and we have will be able to retrieve data from the skb without causing any errors.
Getting data from the skb
So we should have a variable that points to the location in the skb where the data lives, this after the frame/IP/TCP headers have ended in my code it’s usually poffset. We will create a variable called bgpm that will now populate with the bytes from the skb using the bpf_skb_load_bytes function.
1 2 3 4 5 6
struct bgp_message bgpm; int ret = bpf_skb_load_bytes(skb, poffset, &bgpm, sizeof(bgpm)); if (ret != 0) { bpf_printk("error %d",ret); // if we can't load the data print the error message return 0; }
(We can see that the sizeof(bgpm), with the padding enabled was causing this to fail as there were only 19 bytes left in the skb and we were trying to load 20 🙄)
Once we have the header, we need to move our poffset so that we point to whatever exists after the header
1
poffset += sizeof(bgpm); // remove header
Understanding application data
We have successfully parsed the header, so we can now use this information to start to understand what the additional data remaining is and with BGP the message type and the length of the remaining data are key. The bgp.type will be one of the following values:
Where the bgp.length will represent how much data exists (including the header), so to determine how much “remaining” data is left we would remaining = bgpm.len - sizeof(bgpm) given a KEEPALIVE message is just the header, this should return 0. However other message types often come with additional data!
So lets parse the header, and we’ll look at the UPDATE message in further detail!
As mentioned, if you’ve been writing/parsing JSON or higher level data structures then arrays etc. are pretty simplistic. With these older structures we will need to do various bits of logic to determine how many pieces of information are marked as variable.
The Withdrawn Routes is straight forward enough, the Total Path Attributes is mind boggling…
Without screaming into the void too much, we’re given {x} amount of bytes as the Path Attributes and we would need to do the following:
Read the first 3 bytes to get the flags/type/len.
Then dependant on the type read another random sized number of bytes, as each path attribute contains a different amount of data
We can load that len into the another specific path attribute struct and read that particular data
Move the data pointer forward the size of the Path Attribute “header” and the length of the remaining data len.
Once we’ve done all that move the poffset the size of the Total Path Attributes Length so we can read the NLRI data
Sip a large glass of whisky
Modify the BGP data
So whilst everything detailed above is great for gaining insight into what is happening from a BGP perspective, perhaps we may want to impose some changes to the BGP data as it’s flowing through! For this example we will change the AS number of a new route as it’s being pushed out to a ToR switch. In order to do this we will need to look for the Path Attribute with the type of 2 known as the AS_PATH detailed here.
At this point we’ve gone through through each of the Path Attributes found type 2/AS_PATH and pulled it from the skb, and we want to change it to a different AS number.
1 2 3 4 5 6
bgp_as.as = bpf_htonl(65002); ret = bpf_skb_store_bytes(skb, pathOffset, &bgp_as, sizeof(bgp_as), BPF_F_RECOMPUTE_CSUM); if (ret != 0) { bpf_printk("error %d",ret); return 0; }
*(NOTE: pathOffset points to after the path header of the AS_PATH entry exists)
Here we can use the bpf_skb_store_bytes to write an updated bpg_as that has our changed AS number, this helper also has the flag BPF_F_RECOMPUTE_CSUM that takes care of fixing any checksum changes due to the changed underlying data.
NOTE: You should notice that where we’re assigning the new AS 65002 we’re wrapping it with the function bpf_htonl, which is effectively changing a host tonetwork long. Simply put numbers that are used for networking use a different “endian” (the number are stored backwards), you can read more about that here.
The user land BGP program that is peering to the ToR is blissfully unaware that the route it is advertising is using a different AS number 😂 at this point.
Outro
The RFC docs are a great way to begin to understand what this seemingly opaque block of data that proceeds the various headers when processing network data with eBPF. The lack of unbounded loops and some other freely expressible way of manipulating data mean that extra thought has to be given when looking and parsing application data. But with a thoughtful approach I don’t see why most protocols can’t be processed by eBPF, today we need to bind programs to TC (Traffic Control) but once XDP has egress support we can offload so much application processing that the network layer will become incredibly powerful. I’m exciting to parse more protocols :-) (DNS next).
In a previous post I talked a little bit about building up the knowledge with eBPF to start to understand a little bit more about what is going in and out of a network adapter. Basically taking your ethernet frame and stripping off the headers (Ethernet + IP Header + TCP/UDP Header) you are finally left with what remains within the packet from an application or data sense.
All of the code lives within the “learning eBPF” repository, specifically the eBPF code is here. The plan for this post is to step through the bits that I think are useful or could be important…
Note This code did do some Ingress/Egress packet modification so uses some eBPF helpers that requires 6.1+ of the Linux Kernel to work.
The maps!
Presumably you’ve come across these before? If not never fear!! Simply put an eBPF map is the mechanism for communicating between user-land and the in-kernel eBPF program. What is exceptionally cool (in my mind at least) is that these maps use keys and values.. so I don’t have to loop around data comparing and looking for what matches whatver it is i’m looking for, I pass a key and if something matches I get the corresponding data :D
Below is the map that I will use, which is called url_map the key is 20 characters long (a bounded “string” some might say), and the value that is assigned to that key is a struct that i’ve defined above.
1 2 3 4 5 6 7 8 9 10 11 12 13 14
// Defines a different URL associated with a key struct url_path { __u8 path_len; __u8 path[max_path_len]; // This should be a char but code generation between here and Go.. };
There are two eBPF programs defined in the code tc_egress and tc_ingress, bonus points if you can guess how they are attached! For this post, we will only concern ourselves with the tc_ingress program.
So as we would see in the myriad of examples that already exist we need to go through the header identification dance.
Do the sanity checks, and cast the data to the type of ethhdr (Ethernet header)
Find the protocol within the ethernet frame by reading the h_proto within the ethernet header (also called Ethertype).
Cast the data after the ethernet header as a iphdr (IP header)
Find the protocol within the IP Header, we also will need to determine the size of the IP header (turns out they can be different sizes! ¯\_(ツ)_/¯)
To determine the size of the header we times it’s value by four, why I hear you ask! Well this value is multiplied by 32bits do determine the size of the header, so if the value was 6 then the header would be 192 bits (or 24 bytes). So to simply determine the IP header in bytes we can multiply this value by 4!
Cast the data *after the IP Header as a tcphdr (TCP Header)
Like step (5) we will need to determine the size of the TCP Header (it again can be dynamic) and it’s the same step here, we simply need to multiply the value doff by four to determine the header size in bytes.
With all of this calculated we can now infer that the data lives at the end of the Ethernet Header size, the IP Header size and the TCP Header size.
Finally we can determine how big the application data is by taking the tot_len (total length) from the IP Header and subtracting the IP and TCP Header sizes.
Application Data !!
In order to read this data we will need a few things that were mentioned above!
First, we will need the data offset (where the data starts) and that is found after the Ethernet header + the IP Header size (once calculated) and the TCP Header (again, once calculated). We will also need a buffer in order to store the data we will be reading from the socket buffer.
1 2 3 4 5 6 7 8 9 10 11 12
// A data buffer to store our application data char pdata[60];
// Calculate the offset to where our data actually lives poffset = ETH_HLEN + ip_hlen + tcp_hlen;
// Load data from the socket buffer, poffset starts at the end of the TCP Header int ret = bpf_skb_load_bytes(skb, poffset, pdata, 60); if (ret != 0) { return 0; }
We use the bpf_skb_load_bytes to read the a set amount of data (60 bytes) into our buffer (pdata) from the socket buffer (skb) starting from the offset where we know the data is (poffset)!
At this point we have 60 bytes of data, should be enough for us to write some code to understand it.
HTTP Data :-)
Lets look at what happens when we try a HTTP request!
1 2 3 4 5 6 7 8 9
~ curl code/test -vvv * Trying 192.168.0.22:80... * Connected to code (192.168.0.22) port 80 (#0) > GET /test HTTP/1.1 > Host: code > User-Agent: curl/7.87.0 > Accept: */*
...
I’m using curl to request the URL /test from the host code (code is my development VM, that runs code-server). We can see the data that is sent to the server (each line begins with > to determine the direction of communication). The first line of data in a HTTP request is typically a verb followed by the resource we would like to interact with and this request ends with the HTTP specification and a carriage return as defined in the HTTP standards. So we can see the line that we care about is GET /test (we/I don’t really care about the HTTP specification at this point :D).
Find the HTTP method
The first step is to read the first three characters of pdata and make find if pdata[0] == G, pdata[1] == E and pdata[2] == T this will effectively allow us to find if this is both a HTTP request in the first place and specifically if it is a HTTP request!
Once we’ve validated those first 3 bytes we will want to read the more data starting from the 4 byte (three bytes for the request and one for the space between)!
// Find the request URI (starts at offset 4), ends with a space for (int i = 4; i < sizeof(pdata) ; i++) { if (pdata[i] != ' ') { path[i-4] = pdata[i]; } else { path[i-4] = '\0'; path_len = i-4; break; } }
The above function will read through the rest of the HTTP data (from the 4th byte) until it encounters a space, leaving us with the URL we are trying to GET! We can validate this with a debug print statement:
The above explanations detail what and how we’re reading the data, but if we want to “dynamically” look up the HTTP requests we will need to make use of eBPF maps.
In our GO userland code we do the following:
1 2 3 4 5 6 7 8 9 10 11 12 13 14 15 16 17 18 19
path := flag.String("path", "", "The URL Path to watch for") flag.Parse()
// ...
// Create a uint8 array var urlPath [20]uint8 // copy our bytes into the uint8 array (we can cast) copy(urlPath[:], *path)
// place our urlPath as the key err = objs.UrlMap.Put(urlPath, bpfUrlPath{ Path: urlPath, PathLen: uint8(len(urlPath)), }) if err != nil { panic(err) }
As we can see in the code above our Go program when started will read from the flag -path and that will be used as a key in our eBPF map, the value can be ignored for now.
1 2 3 4 5
struct url_path *found_path = bpf_map_lookup_elem(&url_map, path); if (found_path > 0) { bpf_printk("Looks like we've found your path [%s]", path); // perhaps do more, block traffic or redirect? }
In our eBPF program we will do a map lookup on the HTTP request, if that request as a char array exists as a key then we can operate on it!
Starting our Go program now sudo ./http -interface ens160 -path /test will yield the following:
1 2 3 4 5 6 7 8 9
INFO[0000] Starting 🐝 the eBPF HTTP watcher, on interface [ens160] for path [/test] INFO[0000] Loaded TC QDisc INFO[0000] Press Ctrl-C to exit and remove the program <idle>-0 [001] d.s3. 2252901.015575: bpf_trace_printk: <- 0.0.0.0:56345 -> 0.0.0.0:80 <idle>-0 [001] D.s3. 2252901.015642: bpf_trace_printk: -> 192.168.0.22:80 -> 192.168.0.180:56345 <idle>-0 [001] d.s3. 2252901.017552: bpf_trace_printk: <- 0.0.0.0:56345 -> 0.0.0.0:80 <idle>-0 [001] d.s3. 2252901.017793: bpf_trace_printk: <- 0.0.0.0:56345 -> 0.0.0.0:80 <idle>-0 [001] dNs3. 2252901.017812: bpf_trace_printk: <- incoming path [/test], length [5] <idle>-0 [001] dNs3. 2252901.017814: bpf_trace_printk: Looks like we've found your path [/test]
Conclusion
Parsing HTTP isn’t too bad as it is a relatively simple protocol, it uses easy verbs and simple methods for structure with spaces and carriage returns to differentiate. This methodology would potentially work OK with other protocols like DNS, POP3 or SMTP. When things are encrypted we would need someway of decrypting before we can parse the data (that’s beyond me…). However, I hope that this sparks some ideas into playing more with eBPF and attempting to parse and operate on applications with eBPF!
I’ve been wanting to write some hopefully useful posts around eBPF for sometime, although usually by the time I’ve come up with something I though may be useful someone has already beaten me to the punch. Given that I’ve been focussing in networking one way or another for a while, this has largely been the area that I’ve focussed on, although I did manage to put something together for the recent eBPF summit 2023 that I thought was quite fun. As mentioned there are a lot of people that are starting to write eBPF content, so I’ll potentially refer to their posts instead of duplicating content.
XDP vs TC, or even sysprobes
I’ll start with a few acronyms or even technologies in the Linux Kernel that you may or may not have come across. But basically from my perspective at least these are your main options for modifying a running system to interact with networking data.
XDP
There already exists a lot of information about the eXpress Data Plane, so I’ll not delve into too much detail. The tl;dr is that an XDP eBPF program that hooks into XDP will have access to the an incoming network frame before it is processed by the kernel itself. In some cases the eBPF program will be loaded into the NIC driver itself, which will effectively offload the program to the NIC itself.
PROs
The best performance
Excellent for use cases such as firewalls, DDos protection or load balancing
Sees incoming traffic before anything else can make any modifications
CONs
Ingress only, any traffic that you see with an XDP program is only incoming and there is currently no way of seeing traffic that is outbound
Uses the XDP data structure, which is a little different the SKB that is the default for most socket programming.
TC (or Traffic Control)
The Traffic Control is an integral part of the kernel networking structure, largely comprising of the capability of adding things such as qdiscs and filters to an interface. The qdisc largely focuses on providing a TBD and a filter can then be attached to this qdisc, often a filter will actually be an eBPF program under the covers.
A common workflow is:
Create a qdisc or replace an existing one that concerns itself with either ingress or egress. The qdisc is attached to an interface.
Load your eBPF program
Create a filter, that attaches itself to either ingress or egress now exposed through the qdisc on an interface. That filters has the eBPF program attached too it, meaning all traffic either incoming or outgoing will now run through a program (if connected)
Profit 💰
PROs
Provides hooks for ingress and egress
Uses the traditional SKB data structure
CONs
It’s slightly more complicated to attach a TC program to either their ingress or egress queues. The user will need to make use of qdiscs in order to do this, some eBPF SDKs don’t support TC program usage natively.
The traffic a TC eBPF program sees may have already been modified by an earlier XDP program or even the kernel itself.
Syscalls
This might seem a little weird compared to the other two, which are specifically designed in order to handle networking. Whereas an alternative is to attach some eBPF code to a syscall within the kernel, specifically calls such as tcp4_connect() / tcp6_connect(). This is a little bit further down the stack as at this point an incoming packet has already been through a lot of the kernel logic and the eBPF introspection point is as the traffic is about to interact with an application itself.
Programming a network!
So at this point we (hopefully) realise that we’ve a number of different entry points that will allow us to inject our code on the “conveyor belt” that a packet will traverse starting from the NIC all the way to the application (and back, in the case of egress).
Recap
At the beginning of our so called “conveyor belt” we can attach our XDP program and get the raw untouched network data. In the middle of the “conveyor belt” our TC program will become part of the path through the kernel and receive potentially modified network data. At the end of the conveyor belt we can attach code to functions that the application will call in order to get the network data just before it is ingested by the running application.
Data representation
Depending where you attach your program determines two main things, one the relative level of potential modification of traffic and how the traffic is represented.
The XDP struct
I’d write about it but DataDog already have done, you can read that here.
The SKB (Socket buffer)
The SKB is a data type that has existed within the kernel long before eBPF was added to the kernel, and it already comes with a number of helper functions that make interacting with an SKB object a little easier. For more deep dive into SKB you can read this -> http://vger.kernel.org/~davem/skb_data.html
Parsing the data
Regardless of which struct you interact with, they share some commonality and that is largely that there are two variables that are identical across both data types.
These are:
*data, which is a pointer to the data received by the eBPF program
data_len, which is an integer that specified how much data there is (to help make sure you never access *data more than data_len (obvious really 🤓))
So that all seems simple enough, but wait… what is actually in *data?? (Well that is for you to discover)
Well we do that through continually “casting” the *data and moving along it to strip off the various headers in order to understand and find the underlying data!
casting?
You can skip this if you like, but this is a quick (and terrible) example of how we typically take some raw data and turn it into something that makes sense. At the moment *data will just be a stream of random data that won’t make any sense and we will need to effectively add “formatting” too it so that we can understand what it looks like.
Consider the following random line of data Bobby0004500100.503 Harvard Drive90210 some of it makes sense to the raw eye but some of it is unclear.
Imagine the data structure called “person”:
1
2
3
4
5
Name: string Age: number Balance: float Street: string ZipCode: number
If we were to “cast” our random data to the “person” structure above it would suddenly become:
Now all of a sudden I’m able to both understand and access the underlying variables in the structure as they now make sense, I.e. person->Name and find out that this particular object of type person has the name variable “Bobby”!
This is exactly what we will do to our *data !
What’s in the data?
So the first step is to determine if the data starts with an Ethernet frame! Pretty much all of the data that travels around starts with an Ethernet frame, which is pretty simplistic but it’s role is to have a source and destination hardware address (regardless of virtualisation/containerisation/cabled network or WiFi). So our first step is to cast our *data to the type ETHHDR, if this is successful we will now be able to understand the variables that make up the Ethernet header data type. These would include the source and destination MAC addresses, but also more importantly the what the contents of the remaining data is. Again, in most circumstances the contents of the *data after the Ethernet header is typically an IP header, but we will validate be checking the Ethernet frames TBD variable.
Once we validate that the next set of data is the IP Header we will need to cast the data after the Ethernet Header to the type IPHDR. Once we do this we will have access to the IP specific data such as source IP (saddr) or destination address (daddr), again importantly the IP header contains a variable that details what the data is after the end of the IP Header. This is usually a TCP header or UDP header, but there are other alternatives such as sctp etc..
Once we’ve looked inside the IPHeader and determined that the data type is TCP (could be UDP or something else), we will cast the data after both the Ethernet header and the IP header to the type TCP header! (Almost there). With access to the contends to the TCP header we have the TCP specific data, such as source port or destination port, the checksum to ensure validity of the data amongst other useful variables.
We now have almost everything, however the TCP header can be variable length so we will need to determine this by looking at the tcl_len variable, which we need to times by 4. We now have everything we need to get to the final data!
So, the *data points to the beginning of the data! We have determined that there is an Ethernet header followed by a IP header and finally a TCP header, which means *data + Ethernet header + IP header + TCP header = Actual application data !
What can we do with this information ?
As we parse through the various headers, we effectively unlock more and more information at different layers of the OSI model!
[layer 2] The Ethernet Header provides us with the source and destination hardware addresses, we could use this information to potentially stop frames being processed from source MAC addresses that we know to be dangerous.
[layer 3] The IP Header contains the source and destination IP addresses, again we can act like a firewall by having an eBPF program drop all traffic for a specific IP address. Alternatively we could have logic that will potentially redirect traffic based upon the IP addresses of we could even implement load balancing logic at this layer that will redirect to an underlying set of other IP addresses
[layer 4] The TCP or UDP Headers define the destination port numbers, which we can use to determine what the application protocol is (I.e. port 80 typically means that the remaining *data is likely to be HTTP data). More often than not we would perform actions such as load balancing at this layer, based upon the destination (I.e. balance across multiple other load balancer addresses)
[layer 7] As mentioned the data at the end of the collection of various headers is the actual application data, which we can also parse (as long as we know the format). So for instance if an external web browser were to try and access /index.html on my machine with an eBPF program attached, I’d parse all the way to TCP to determine that it was port 80 and then the application data should be in the HTTP format. I could validate this by looking at the first three characters of application data (after all the headers), with some pseudo code like below:
1 2 3 4 5
ApplicationData = EthernetHDR + IPHDR + TCPHDR // Add all headers lengths together to find the data
If ( data[ApplicationData] = "G" && data[ApplicationData+1] = "E" && data[ApplicationData+2] = "T" ) {
	// It's a HTTP GET request
	// do something exciting
}
Wrap up
Now we “kind of” understand the logic we should probably look at implementing some code to do all this .. that’s for another day though.
It’s starting to feel a little bit as though the noose is starting to tighten a lot in the IT industry at the moment, whether it be Open Source projects spuriously changing their licenses and pulling the rug from their users to companies that expanded too far and too quickly during the pandemic suddenly contracting. This tightening of the belt has also impacted a bunch of tooling that people have come to depend on as part of their day to day life, or their workflow.
Slack isn’t slack when it comes to the community usage
So! Whats this rambling collection of words about?
Like all of the wonderful platforms as a service out there IRC for money Slack has the various tiers, each unlocking more and more functionality whilst ramping up the various costs associated. A lot of communities (especially in the Open Source world) have been built on the free and open communication that takes place on a Slack instance/workspace devoted to a project or community. But the problem i’m trying to address in this post is the hoops people need to jump though in order to join these communities hosted on Slack.
When the community first starts out, it makes perfect sense that could be a need for simple restraints and/or approval process for joining a community. This is usually handled through an invitation process, if you want to join the community then you need to somehow signal that intent allowing the owner(s) of the community to then invite you to join. However once you start to hit any sort of scale then this simply becomes an unmanageable task, ultimately impacting the growth and health of a hopefully growing community and it is at this point where you would potentially want to open the floodgates as the community (hopefully) exponentially grows.
Note On the side of security, we’re moving to a reactive instead of proactive approach for maintaining community membership (again coming with it’s own challenges).
So what are your options?
The legitimate option
You’re main options without trying to automate anything are to simply select the + Add coworkers button and create an invite link, this can be set to never expire and is meant to work for 400 people (YMMV). It doesn’t really look like there are many options available to automate this procedure, you can open Slack in a web browser with “developer mode” enabled to capture the API endpoint but i’ve been unable to determine what token can be used.
The endpoint for this API call is https://<workspace>.slack.com/api/users.admin.createSharedInvite, which should be posted with a FORM with fields such as token, set_active however no token I could produce would seem to get this to work (even taken the token used in the browser).
With trying to replicate the Slack client behaviour not working, we’re left to trying less legitimate routes to make it easier for people to join the Slack workspace. So there are a number of Open Source projects that are quite old and unmaintained that make use of an old API (undocumented) endpoint /api/users.admin.invite (not to be confused with /api/admin.users.invite, api docs). This endpoint works with a legacy token that you’re no longer able to create (as of 2020).. it turns out invoking the correct sequence will allow you to create a token that can still use this endpoint however!
Create the App from scratch, give it a name (any will do)
Scroll down and make a copy the Client ID and the Client Secret
Scroll further up and find the Permissions box
In the Redirect URLs box we will need to enter a bogus URL (make sure it doesn’t actually resolve) such as https://0.0.0.0/, ensure you click Save URLs
Under the User Token Scopes, select the Add an OAuth Scope and add admin
Finally scroll back up to OAuth Tokens for Your Workspace and select Install to Workspace.
Select the Allow button to create our first token!
At this point we will have a User OAuth Token, however this token even with it’s permissions wont work with the users.admin.invite endpoint 🙄
To generate our actual token we need to do some additional oauth steps!
Build our specific url! https://<workspace>.slack.com/oauth?client_id=<Client ID>&scope=admin%2Cclient
Replace the <workspace> with the name of your particular workspace, and change <Client ID> to the ID from your application.
Paste this URL into a new tab on the logged in browser, you’ll be redirected to a webpage that won’t work (remember the 0.0.0.0). However you should see the new URL in the address bar! (Including a code= part of the URL). Grab this code for the next part!
Build our new URL! https://<workspace>.slack.com/api/oauth.access?client_id=<Client ID>&client_secret=<Client Secret>&code=<code>
Either open this in a web browser again, or in curl (remember to put the URL in quotes ")
The output from this will be some json {"ok":true,"access_token":"xoxp-..., the access_token is what we’re after !!
Verify that you can invite people with your new token!
1
2
3
curl -X POST 'https://<workspace>.slack.com/api/users.admin.invite' \
--data 'email=dan@thebsdbox.co.uk&token=<token>&set_active=true' \
--compressed
A few seconds later…
1
{"ok":true}
Just to test, you can run the invite command again and if it’s all working as expected you should receive an error!
That seems like a lot of effort, but in the end it’s now possible again to build a simple web form allowing people to register themselves to join your Slack workspace!
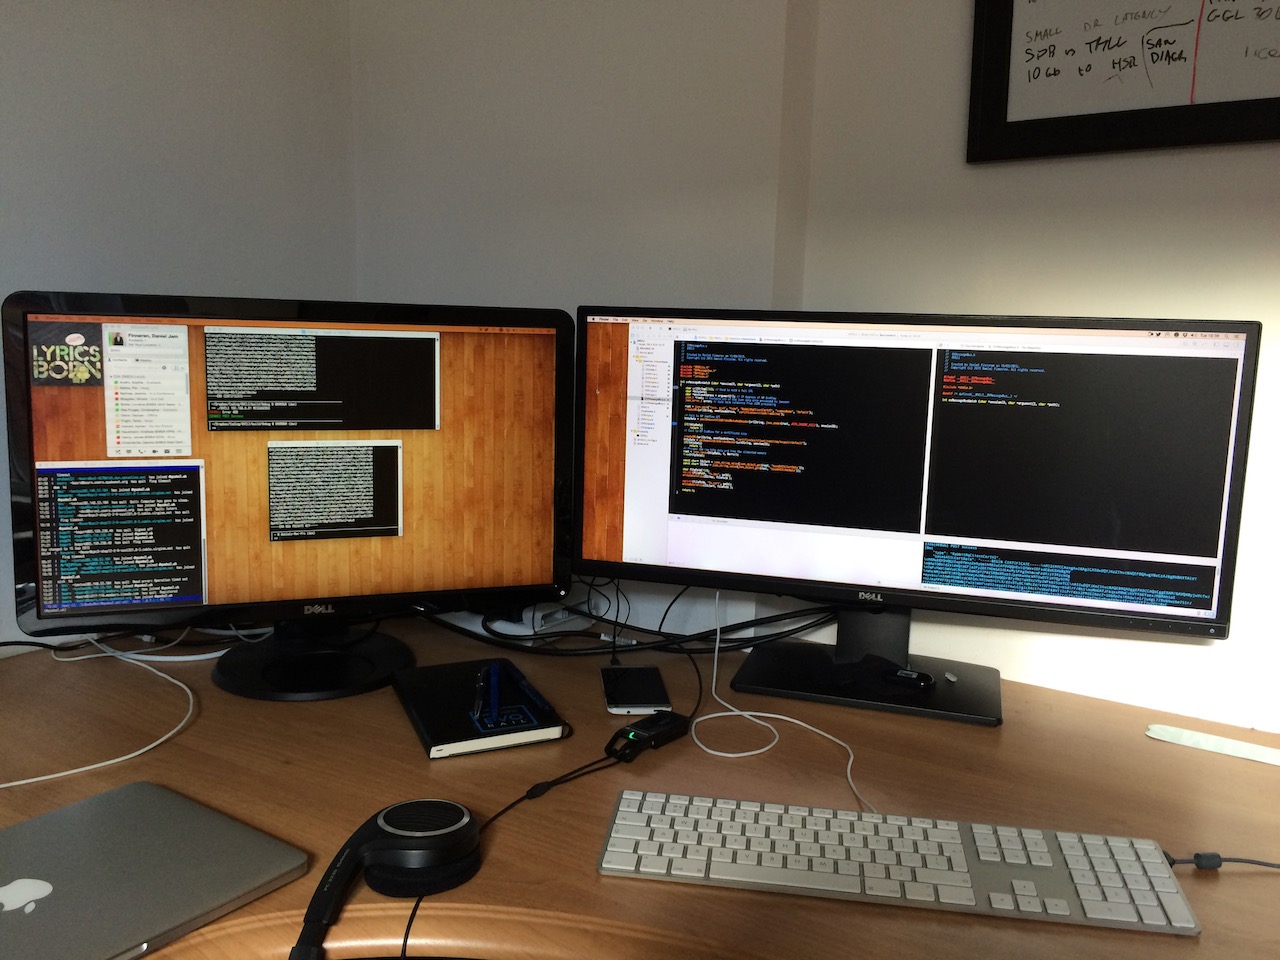
As much as I love a nice shiny laptop, i’ve been using a steadily evolving desktop machine for well over a decade. In fact I don’t think i’ve ever been without a workstation since I was first introduced to a computer:
In hindsight I realise that my current set up is actually pretty aged, but either I haven’t noticed or don’t care enough to upgrade. I also feel like i’ve been through a lot of Operating systems through my time:
At some point at University I started a part time job as a Macintosh repair/support person, which I used to hold the belief was my worst work experience. However, this exposed me to the world of Apple hardware and the symbiotic operating system. Well.. System7, MacOS 8 and MacOS 9 were pretty grim but some of the hardware 🤩. I remember one day someone bringing in a 20th Anniversary Mac The product was a complete failure, but look at it !
The G5 tower, such a clean yet imposing piece of metal.. pop the side off and it looked like the inside of a Dyson vacuum cleaner. I also got to work with the Apple rack mount hardware too, arguably the last time there would be anything aesthetically pleasing in a data centre.
Anyway… I was lucky enough to be given a Powerbook G4, it had been repaired and after 6 months the person had never collected it or replied to calls/emails ¯\_(ツ)_/¯ and thus began my switch over to OSX (then MacOS X and now MacOS, clearly naming is hard).
Hackintosh
With a shiny Powerbook in hand I proceeded to move all my daily content (music/photos) and social platform(s).. largely just last.fm, myspace and facebook at that point. My poor old workstation started to be turned on less and less as I started to find it slow and clunky when compared. In the mid 2000s Apple did the unthinkable (or maybe the thinkable, IBM were taking forever for a laptop G5 chip) and pivoted the Apple hardware away from PowerPC to Intel hardware, HOWEVER the OS whilst x86 is still tied to Apple specific hardware.
I honestly have no recollection where I found it (probably a dodgy torrent site), but I came across a OS X 10.4 DVD Image that was hacked to install on non Apple hardware and that was it!
Some looking around on archive.org has revealed that it was JaS OS Hackintosh OS images..
For the next couple of OS X releases all of the underlying work was largely taken care of and things “just worked”.. here I was with the Apple experience but without the additional cost!
Apple Airport on the shelf there, a fantastic Access point back in the day The Hackintosh’s endured a lot of my terrible skillz at WoW
Additional complexity
At some point the overhead of producing these packaged OS installers clearly wasn’t worth it (presumably Apple were making things additionally difficult) and suddenly a lot of the overhead was past down to the users. At this point Hackintosh users suddenly had to care about things like EFI/Bootloaders/Kexts and a raft of additional tooling 🤯.
To get a working system the following steps usually were required:
Get a USB stick
Create an EFI partition
Install a bootloader (clover was the one, back in the day) and kexts for your system
Get a MacOS X installer and write it to the USB stick
Boot from the USB stick and find that (Display/USB/Network/Disk etc.. didn’t work) go back to step 3
Install MacOS X to internal disk
Boot from USB Stick into Mac OSX on internal disk
Transfer working /EFI to internal disk and install any missing drivers/kernel modules
Hope Apple didn’t release anything new for a while…
Additionally in the middle of all this Nvidia had a falling out with Apple, meaning that Apple switched to AMD and immediately stopped any new drivers for Nvidia cards :-(
This was pretty much par for the course until MacOS Big Sur was released at which point a new boot loader was required (for reasons I’m not bothered to understand at this point)… Whilst this new bootloader allowed for installing these new MacOS releases, it incurs a significant overhead.. largely the managing of a LOT of XML. If by some chance you manage to incant a working /EFI configuration then lucky you, but it’s a slow and steady process involving many many many reboots and kernel panics. Luckily there is a pretty good community (it’s always about a strong community) in the hackintosh space both on reddit and in other places such as TonyMacx86. The community is pretty helpful at inspecting peoples XML and pointing out irregularities and mistakes and getting people on their way.
With a working /EFI I managed to move to OpenCore and finally stand up BigSur and then later on Monteray!
Today
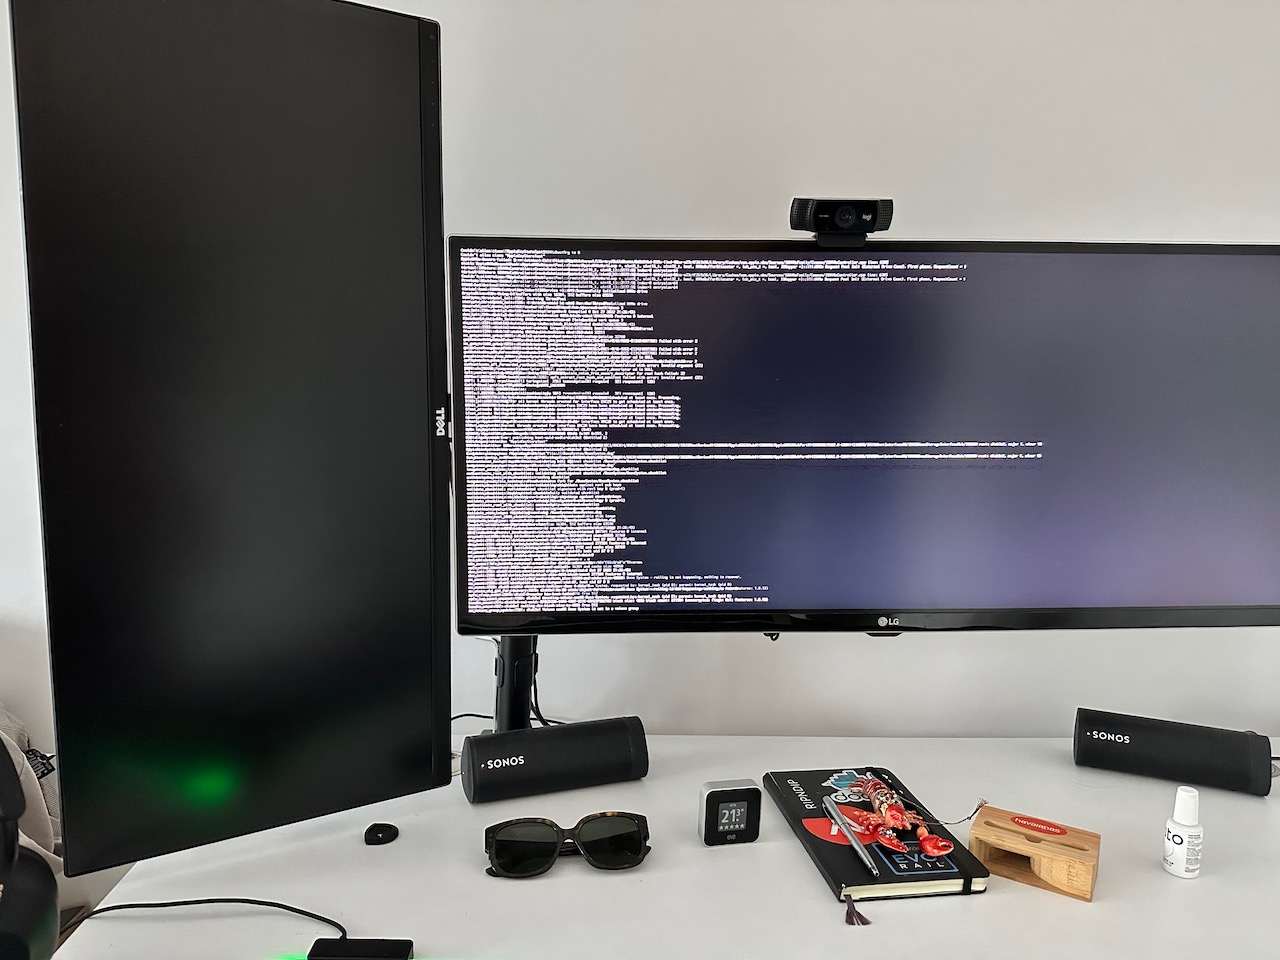
So here we are.. to today (or the day I wrote this)..
Anyway, for “reasons” the /EFI partition is FAT (old Microsoft standard) which isn’t the most reliable during power loss… Inevitably I had a powercut a few days ago and my /EFI partition was wiped, which lost the entire contents of my finely tuned and artisanal XML config. At this point I couldn’t decide if I had the energy to go through this process again. But given the xmas break and prospect of having to speak with the in-laws I decided this might be an opportunity..
The process has improved since I followed the steps for BigSur, in fact the guide for OpenCore is fantastic and the additional drivers for USB/Audio just work™️ etc..
Get the OpenCore bootloader
Add in the ACPI tables for your architecture
Add in drivers that are needed
Fight with XML
Fight with XML more
Fight with XML even more
Profit?
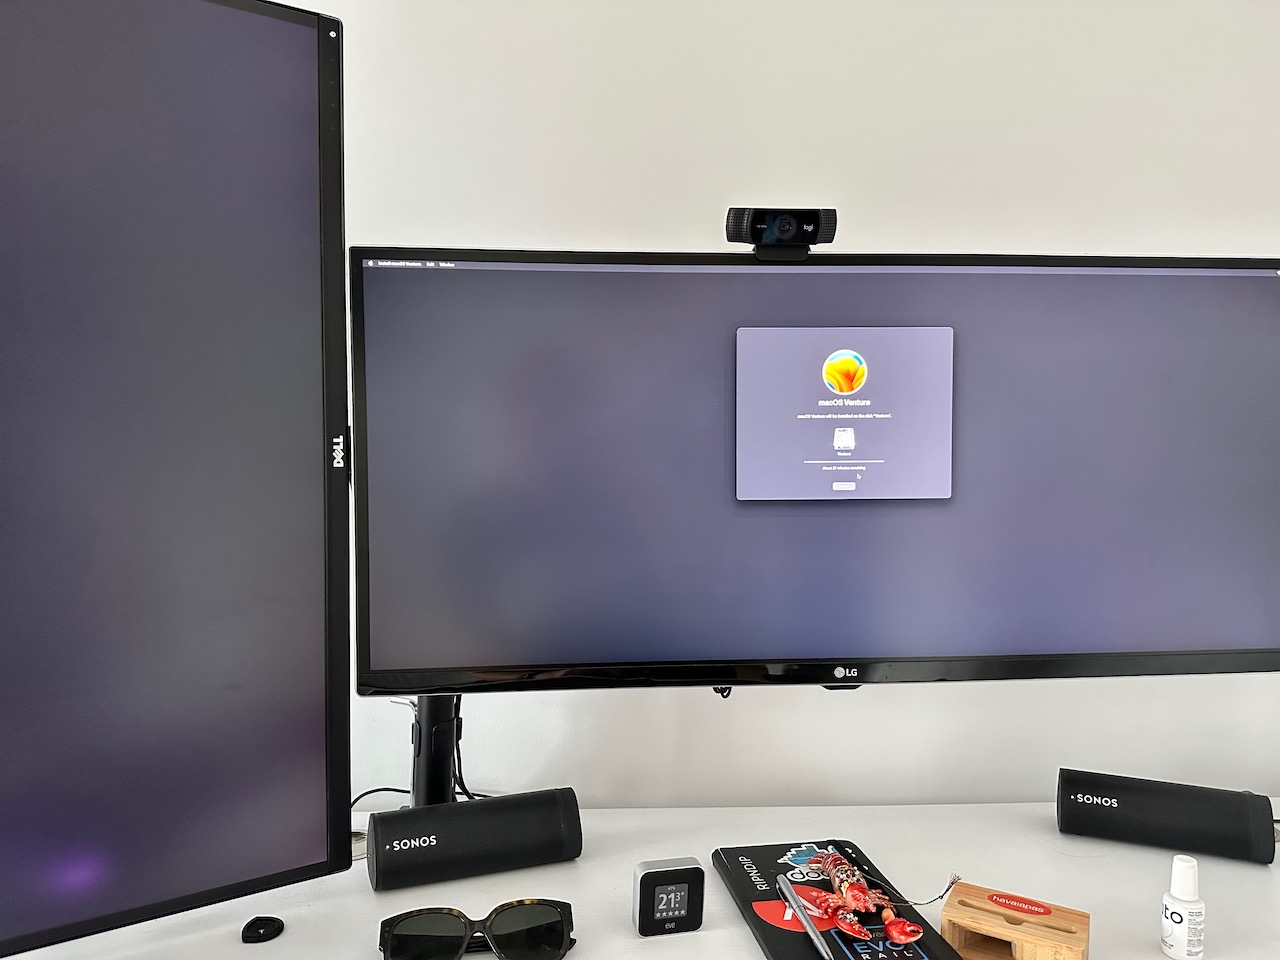
Nope Yep
My trusty workstation is now back up and running on Ventura (although it doesn’t really seem like an OS for workstation use … )
The Future
The move to Intel allowed hackintosh’s to become a thing, however the recent move to ARM from Apple will probably be the final nail in the coffin in the community. It’s been a good run of running MacOS on my hardware, but it does leave me in a quandary of where to go next when I can no longer run a Hackintosh.
// So we have a Kubernetes cluster in r.Client, however we can't use it until the caches // start otherwise it will just return an error. So in order to get things ready we will // use our own client in order to get the key and set up the Google Maps client in advance config, err := restClient.InClusterConfig() if err != nil { kubeConfig := cmdClient.NewDefaultClientConfigLoadingRules().GetDefaultFilename() config, err = cmdClient.BuildConfigFromFlags("", kubeConfig) if err != nil { return err } } // create the clientset clientset, err := kubernetes.NewForConfig(config) if err != nil { panic(err.Error()) }
func (r *DirectionsReconciler) Reconcile(ctx context.Context, req ctrl.Request) (ctrl.Result, error) { // Set the log to an acutal value so we can create log messages log := log.FromContext(ctx) log.Info("Reconciling direction resources")
var directions katnavv1.Directions if err := r.Get(ctx, req.NamespacedName, &directions); err != nil { if errors.IsNotFound(err) { // object not found, could have been deleted after // reconcile request, hence don't requeue return ctrl.Result{}, nil } log.Error(err, "unable to fetch Directions object") // we'll ignore not-found errors, since they can't be fixed by an immediate // requeue (we'll need to wait for a new notification), and we can get them // on deleted requests. return ctrl.Result{}, client.IgnoreNotFound(err) } // your logic here log.Info("Determining journey", "Source", directions.Spec.Source, "Destination", directions.Spec.Destination)
$ kubectl get directions directions-to-sheffield -o yaml
apiVersion: katnav.fnnrn.me/v1
kind: Directions
metadata:
  annotations:
    kubectl.kubernetes.io/last-applied-configuration: |
      {"apiVersion":"katnav.fnnrn.me/v1","kind":"Directions","metadata":{"annotations":{},"name":"directions-to-sheffield","namespace":"default"},"spec":{"destination":"Sheffield, uk","source":"York, uk"}}
  creationTimestamp: "2021-07-28T14:34:56Z"
  generation: 2
  name: directions-to-sheffield
  namespace: default
  resourceVersion: "6986253"
  uid: c4077b0b-8f2f-4fc3-82c0-2d690a24d98a
spec:
  destination: Sheffield, uk
  source: York, uk
status:
  directions: |
    Head southwest on Lendal Bridge/Station Rd/A1036 toward Rougier St/B1227Continue to follow A1036
    Keep left to continue toward Station Rd/A1036
    Continue onto Station Rd/A1036Continue to follow A1036
    Turn right onto Blossom St/A1036Continue to follow A1036
    At the roundabout, take the 2nd exit onto Tadcaster Rd Dringhouses/A1036
    Take the ramp to Leeds
    Merge onto A64
    Merge onto A1(M) via the ramp to Leeds/M1/Manchester/M62
    Keep right at the fork to continue on M1
    At junction 34, take the A6109 exit to Sheffield(E)/Rotherham(C)/Meadowhall
    At Meadowhall Roundabout, take the 4th exit onto Meadowhall Rd/A6109
    Keep right to stay on Meadowhall Rd/A6109Continue to follow A6109
    At the roundabout, take the 1st exit onto Brightside Ln/A6109Continue to follow A6109
    Slight right onto Savile St/A6109
    Turn right onto Derek Dooley Way/A61Continue to follow A61
    Slight left onto Corporation St/A61
    Slight left onto Corporation St/B6539
    At the roundabout, take the 2nd exit onto W Bar Green/B6539Continue to follow B6539
    At the roundabout, take the 3rd exit onto Broad Ln/B6539Continue to follow B6539
    At the roundabout, take the 1st exit onto Upper Hanover St
    Continue onto Hanover Way
    At the roundabout, take the 1st exit onto Moore St
    Continue onto Charter Row
    Continue onto Furnival Gate
    Furnival Gate turns left and becomes Pinstone St
    Turn right onto Burgess St
    Burgess St turns right and becomes Barker's Pool
    Barker's Pool turns left and becomes Leopold St
  distance: 93.8 km
  duration: 'Total Minutes: 77.816667'
  endLocation: Sheffield, UK
  routeSummary: M1
  startLocation: York, UK


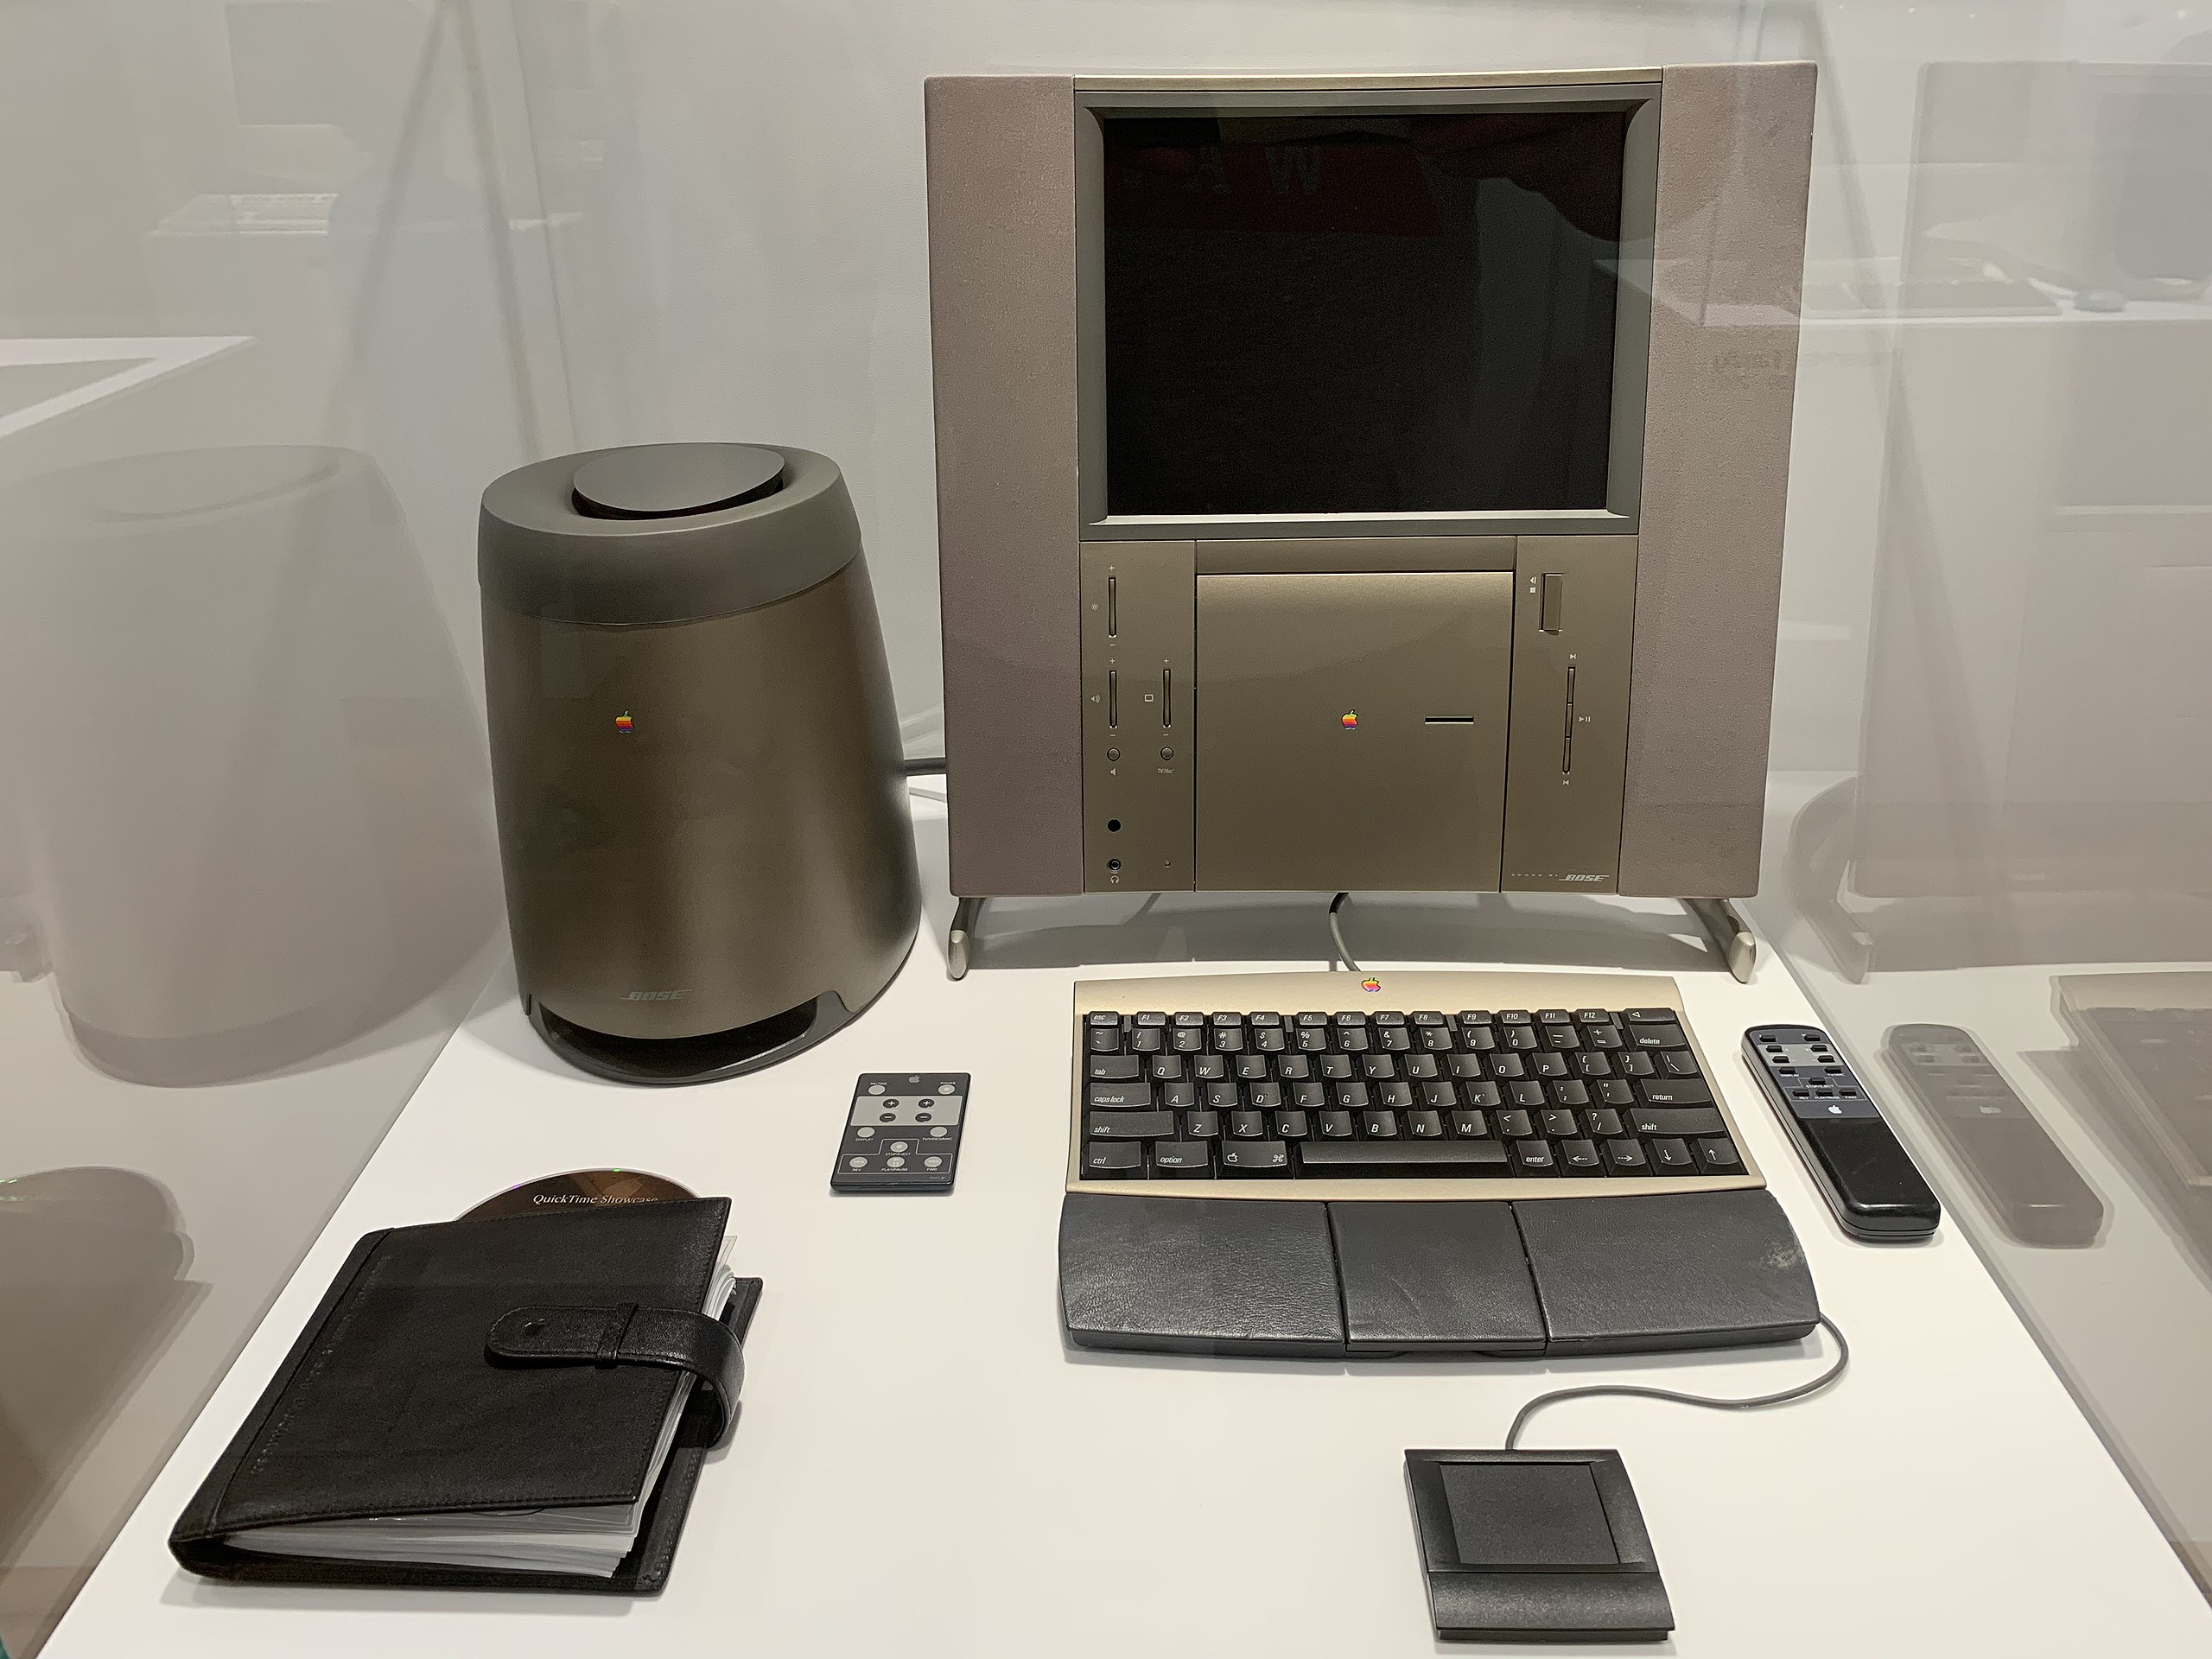 The product was a complete failure, but look at it !